
前提
小呆是一只目前全身黑色的小狗1,所以有些时候拍照它躲在黑暗的地方就完全看不清楚了。正好这段时间在为大创项目学习深度学习,目前也看完了 object_detection 方面的资料,了解到谷歌开源了一个物体识别的库,也想试一试可不可以直接拿来在大创里面分类病例。于是就来先做做实验,使用深度学习为小呆做一个私人定制的识别器吧。
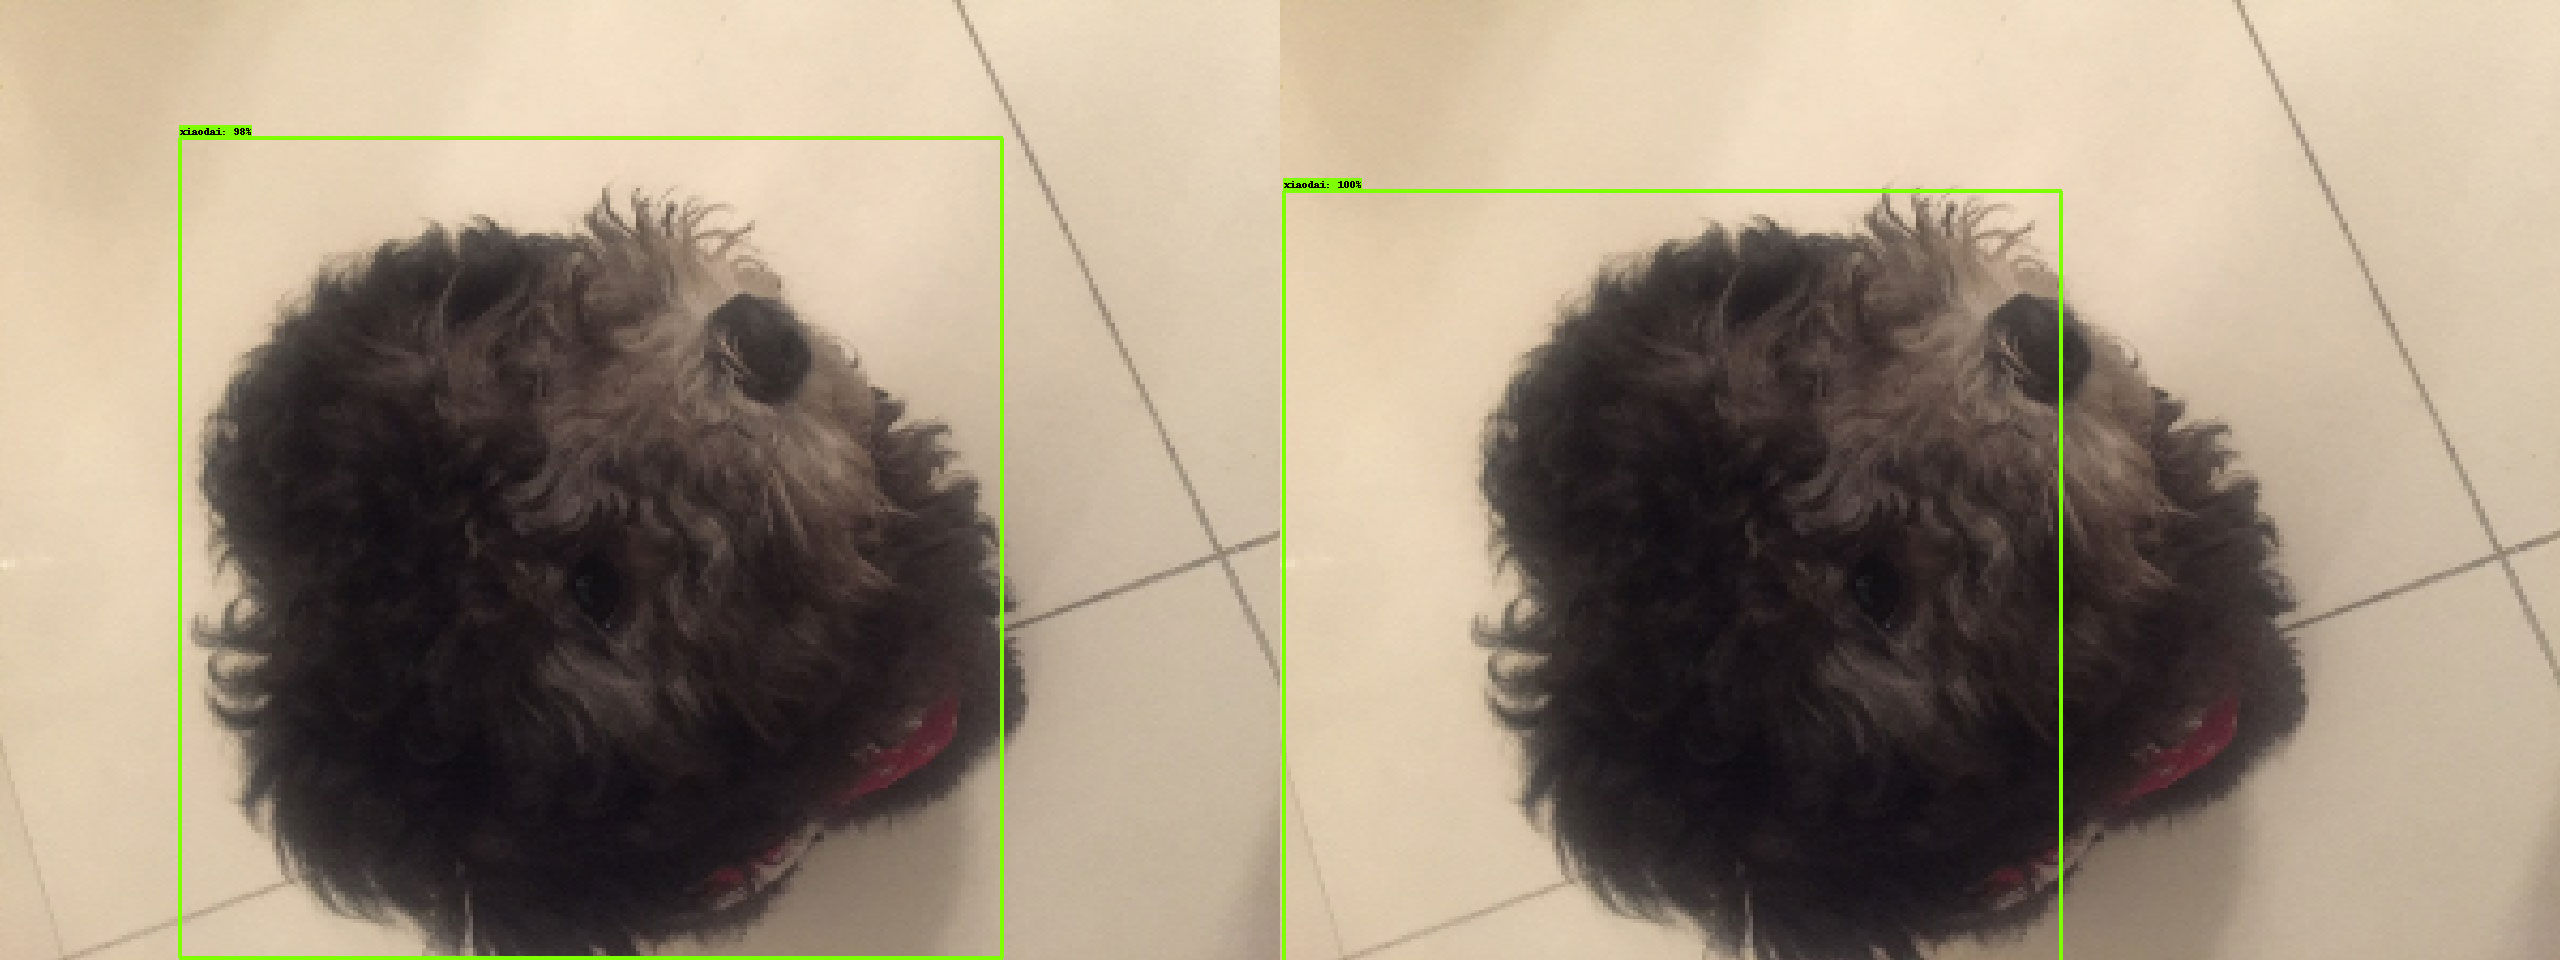
效果展示
环境配置
我的环境:
MacOS Mojave 10.14.3
Python 3.7
IDE: PyCharm
下面的内容都是按照这个大前提来做的
下载谷歌 API
首先就去下载谷歌的物体识别 API 吧,进入models/installation.md at master · tensorflow/models · GitHub后点击 Download 开始下载,下载完后解压到一个你的自定义目录,然后用 pycharm 打开这个 目录下的 research/object_detection 。
设置 Python 依赖
既然都是使用别人的库,那环境肯定也要按照别人的来设置。首先 python 依赖先安装好:
1
2
3
4
5
6
7
8
9

pip install tensorflow
pip install PILLOW
pip install Cython
pip install jupyter
pip install padas
pip install lxml
pip install pycocotools
pip install opencv-python
pip install contextlib2
编译 protobuf 文件
然后还需要安装 protobuf-compiler 来编译一部分内容,因为这个库使用 Protobuf 来设置一些训练的变量。如果你已经提前安装的 protobuf-compiler 的话就直接运行
1
2

# From tensorflow/models/research/
protoc object_detection/protos/*.proto --python_out=.
如果没有提前安装 Protobuf-compiler 的话,我们就需要来手动安装(写在后面)
设置 PYTHONPATH
最后就是设置 silm 到环境路径
1
2

# From tensorflow/models/research/
export PYTHONPATH=$PYTHONPATH:`pwd`:`pwd`/slim
注意,这条命令需要在每一次启动终端的时候输入2,否则会出现错误 no module name “object_detection”
检测是否可以正常运行
1

python object_detection/builders/model_builder_test.py
如果这条命令没有报错的话,就说明环境设置成功了。3
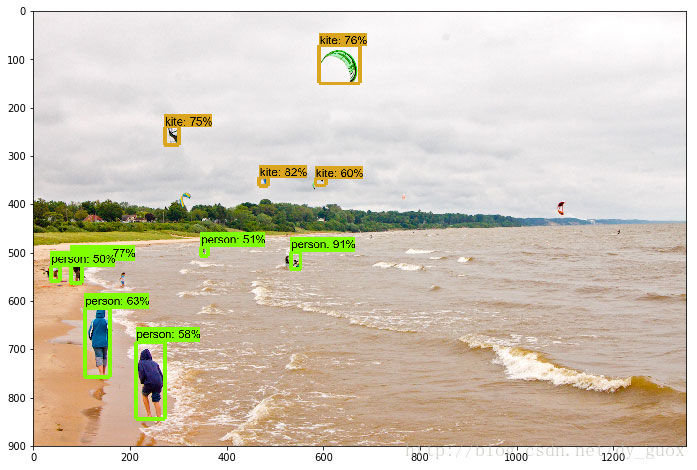
这个时候如果打开 object_detection_tutorial.ipynb 文件,注释掉 %matplotlib inline 4,然后在最下面的 for 循环底部加入 ply.savefig( YOURSAVEPATH ) ,运行整个文件。第一次运行会很慢,因为会去下载预先训练好的模型。运行完成后你就应该可以在 YOURSAVEPATH 中找到处理后,物体识别后的图片。
手动安装 Protobuf-compiler
对于 Linux 用户
1
2
3
4
5
6
7
8

# From tensorflow/models/research/
wget -O protobuf.zip https://github.com/google/protobuf/releases/download/v3.7.0/protoc-3.7.0-linux-x86_64.zip
# 写这篇文章时 protobuf 的版本为 3.7.0
# 解压
unzip protobuf.zip
# 运行编译
# From tensorflow/models/research/
./bin/protoc object_detection/protos/*.proto --python_out=.
对于 MacOs 用户
1
2
3
4
5
6
7
8
9
10

# 使用 brew 安装
# 先安装 homebrew, 提前安装了的可以跳过
/usr/bin/ruby -e "$(curl -fsSL https://raw.githubusercontent.com/Homebrew/install/master/install)"

# 安装 protobuf
brew install protobuf

#运行编译
# From tensorflow/models/research/
protoc object_detection/protos/*.proto --python_out=.
运行完后,你应该可以在 tensorflow/models/research/object_detection/protos 文件夹下发现很多 *.py 文件
训练我们自己的模型
准备数据
首先我们准备一些图片分别放在 train 和 test 文件夹中,然后使用打码工具进行人工标注5,标注完保存后的 xml 数据应该是这样的6:
1
2
3
4
5
6
7
8
9
10
11
12
13
14
15
16
17
18
19
20
21
22
23

<annotation>
    <folder>test-dataset</folder>
    <filename>IMG_1771.jpeg</filename>
    <size>
        <width>960</width>
        <height>1280</height>
        <depth>3</depth>
    </size>
    <segmented>0</segmented>
    <object>
        <name>xiaodai</name>
        <pose>Unspecified</pose>
        <truncated>0</truncated>
        <occluded>0</occluded>
        <difficult>0</difficult>
        <bndbox>
            <xmin>315</xmin>
            <ymin>494</ymin>
            <xmax>593</xmax>
            <ymax>828</ymax>
        </bndbox>
    </object>
</annotation>
其中,下面列的数据是必须要有的:
- filename
- width
- height
- name(也可以成为 class 类别)
- xmin
- ymin
- xmax
- ymax
然后,我们需要把这些 xml 数据转换为 csv 数据,代码如下:
1
2
3
4
5
6
7
8
9
10
11
12
13
14
15
16
17
18
19
20
21
22
23
24
25
26
27
28
29
30
31
32
33
34
35
36
37
38

import os
import glob
import pandas as pd
import xml.etree.ElementTree as ET

os.chdir('YOURXMLPATH') # 填入你的 xml 文件所在文件夹(最好为绝对路径)
path = 'YOURXMLPATH' # 填入你的 xml 文件所在文件夹(最好为绝对路径)

def xml_to_csv(path):
    xml_list = []
    for xml_file in glob.glob(path + '/*.xml'):
        print(xml_file)
        tree = ET.parse(xml_file)
        root = tree.getroot()
        for member in root.findall('object'):
            value = (root.find('filename').text, # xml 中 filename 的位置
                     int(root.find('size')[0].text), # xml 中 width 的位置
                     int(root.find('size')[1].text), # xml 中 height 的位置
                     member[0].text, # xml 中 name(class类别) 的位置
                     int(member[5][0].text), # xml 中 xmin 的位置
                     int(member[5][1].text), # xml 中 ymin 的位置
                     int(member[5][2].text), # xml 中 xmax 的位置
                     int(member[5][3].text) # xml 中 ymax 的位置
                     )
            xml_list.append(value)
    column_name = ['filename', 'width', 'height', 'class', 'xmin', 'ymin', 'xmax', 'ymax']
    xml_df = pd.DataFrame(xml_list, columns=column_name)
    return xml_df


def main():
    image_path = path
    xml_df = xml_to_csv(image_path)
    xml_df.to_csv('train.csv', index=None) # 在这里修改生成的文件名
    print('Successfully converted xml to csv.')


main()
分别对 train 和 test 运行得到两个 xml 分别为 train.xml 和 test.xml
然后再将 csv 和 原图片整合为 tfrecord 文件喂给神经网络,转换的代码如下:
1
2
3
4
5
6
7
8
9
10
11
12
13
14
15
16
17
18
19
20
21
22
23
24
25
26
27
28
29
30
31
32
33
34
35
36
37
38
39
40
41
42
43
44
45
46
47
48
49
50
51
52
53
54
55
56
57
58
59
60
61
62
63
64
65
66
67
68
69
70
71
72
73
74
75
76
77
78
79
80
81
82
83
84
85
86
87
88
89
90
91
92
93
94
95
96
97
98
99
100

import os
import io
import pandas as pd
import tensorflow as tf

from PIL import Image
from utils import dataset_util
from collections import namedtuple, OrderedDict

# 原图片的位置(最好为绝对路径)
os.chdir('PATH')

flags = tf.app.flags
flags.DEFINE_string('csv_input', '', 'Path to the CSV input')
flags.DEFINE_string('output_path', '', 'Path to output TFRecord')
FLAGS = flags.FLAGS


# TO-DO replace this with label map
# 这里要根据你一共要分多少类别来做修改,比如我如果只分一类,类名叫 xiaodai ,我的程序就是下面注释的代码这个样子。如果你要分两类,就是下面没注释的代码这个样子
# def class_text_to_int(row_label):
#     if row_label == 'xiaodai':
#         return 1
#     else:
#         None

def class_text_to_int(row_label):
    if row_label == 'class1':
        return 1
	  elif row_label == 'class2':
		  return 2
    else:
        None


def split(df, group):
    data = namedtuple('data', ['filename', 'object'])
    gb = df.groupby(group)
    return [data(filename, gb.get_group(x)) for filename, x in zip(gb.groups.keys(), gb.groups)]


def create_tf_example(group, path):
    with tf.gfile.GFile(os.path.join(path, '{}'.format(group.filename)), 'rb') as fid:
        encoded_jpg = fid.read()
    encoded_jpg_io = io.BytesIO(encoded_jpg)
    image = Image.open(encoded_jpg_io)
    width, height = image.size

    filename = group.filename.encode('utf8')
    image_format = b'jpg'
    xmins = []
    xmaxs = []
    ymins = []
    ymaxs = []
    classes_text = []
    classes = []

    for index, row in group.object.iterrows():
        xmins.append(row['xmin'] / width)
        xmaxs.append(row['xmax'] / width)
        ymins.append(row['ymin'] / height)
        ymaxs.append(row['ymax'] / height)
        classes_text.append(row['class'].encode('utf8'))
        classes.append(class_text_to_int(row['class']))

    tf_example = tf.train.Example(features=tf.train.Features(feature={
        'image/height': dataset_util.int64_feature(height),
        'image/width': dataset_util.int64_feature(width),
        'image/filename': dataset_util.bytes_feature(filename),
        'image/source_id': dataset_util.bytes_feature(filename),
        'image/encoded': dataset_util.bytes_feature(encoded_jpg),
        'image/format': dataset_util.bytes_feature(image_format),
        'image/object/bbox/xmin': dataset_util.float_list_feature(xmins),
        'image/object/bbox/xmax': dataset_util.float_list_feature(xmaxs),
        'image/object/bbox/ymin': dataset_util.float_list_feature(ymins),
        'image/object/bbox/ymax': dataset_util.float_list_feature(ymaxs),
        'image/object/class/text': dataset_util.bytes_list_feature(classes_text),
        'image/object/class/label': dataset_util.int64_list_feature(classes),
    }))
    return tf_example


def main(_):
    writer = tf.python_io.TFRecordWriter(FLAGS.output_path)
    path = os.path.join(os.getcwd(), '')
    examples = pd.read_csv(FLAGS.csv_input)
    grouped = split(examples, 'filename')
    for group in grouped:
        tf_example = create_tf_example(group, path)
        writer.write(tf_example.SerializeToString())

    writer.close()
    output_path = os.path.join(os.getcwd(), FLAGS.output_path)
    print('Successfully created the TFRecords: {}'.format(output_path))


if __name__ == '__main__':
    tf.app.run()
你需要复制上面的代码为一个 py 文件,然后把文件粘贴到 tensorflow/models/research/object_detection 文件夹中,因为这个代码引用了 object_detection 库。然后打开终端,输入命令执行:
1
2
3

# --csv_input 输入的 csv 文件的地址(最好为绝对路径)
# --output_path 输出的 tfrecord 文件地址
python generate_tfrecord.py --csv_input=data/test_labels.csv  --output_path=test.record
分别对 train.csv 和 test.csv 执行,得到 train.record test.record。在 tensorflow/models/research/object_detection/ 下新建 training 文件夹,将 train.record 和 test.record 放入 data 文件夹。
准备训练配置文件
进入 https://github.com/tensorflow/models/blob/master/research/object_detection/g3doc/detection_model_zoo.md 选择你想要的配置名,然后进入 tensorflow/models/research/object_detection/samples/config 文件夹下选择同样配置名的 config 文件,将config 文件放入 training 文件夹,然后对它进行文本编辑:
-
num_classes: 根据自己实际要分多少类来更改 -
batch_size: 24 可以调整 -
input_path: train.record 的位置(最好为绝对路径) -
input_path: test.record 的位置(最好为绝对路径) - 两个
label_map_path: pbtxt 文件的位置 7
到目前为止,就万事俱备只欠东风课。
开始训练
终端到 tensorflow/models/research/ 目录下,一定要先添加 PYTHONPATH ,然后运行如下命令:
1
2
3
4
5
6
7
8
9
10

# From tensorflow/models/research/
# --pipeline_config_path: config 配置文件所在位置
# --model_dir 模型保存位置

python object_detection/model_main.py \
    --pipeline_config_path=object_detection/training/ssd_mobilenet_v2_coco.config \
    --model_dir=object_detection/training \
    --num_train_steps=50000 \
    --num_eval_steps=2000 \
    --alsologtostderr
不出意外的话,终端就会显示正在训练了,你的电脑风扇也开始起飞了。
提取模型
训练完成后, 你可以在模型保存位置(本例子中为 object_detection/train )找到很多的 checkpoint 文件,这些文件保存了模型中所有变量的数值,也是这些文件保证了如果你一不小心关掉了训练了话,下一次也可以从断点开始运行。那么我们现在就是要用这些 checkpoint 提取模型出来。
1
2
3
4
5
6
7
8
9
10

# From tensorflow/models/research/
# --pipeline_config_path: config 文件位置
# --trained_checkpoint_prefix: checkpoint 文件位置,model-ckpt-XXXX, XXXX 是步数
# --output_directory: 模型输出位置

python object_detection/export_inference_graph.py \
    --input_type=image_tensor \
    --pipeline_config_path=object_detection/training/ssd_mobilenet_v2_coco.config \
    --trained_checkpoint_prefix=object_detection/training/model.ckpt-78681 \
    --output_directory=waifu_recognition
运行完后你就可以在模型输出位置找到一个生成的文件夹,里面包含了文件 frozen_inference_graph.pb ,这也就是我们需要的模型
测试模型
我们还是那一开始的 object_detection_tutorial.ipynb 来测试自己的模型预测。首先替换 object_detection/test_image 下的两张图片为你自己的测试文件,名字分别为 image1.jpg 和 image2.jpg 。然后修改一下程序:
- 将你的输出模型文件夹移动到
object_detection下 - 35 行左右 MODEL_NAME = ‘你的文件夹名字’
- 41 行左右 PATH_TO_LABELS = os.path.join(‘data’, ‘你 data 文件夹下的 pbtxt 文件文件名’)
- 运行
因为我们之前在加入了 plt.savefig(...) 来保存预测的图片,所以等运行完后你就可以在 test_image 文件夹下发现经过预测的文件了。
到现在为止,教程就结束了。这也是最基本的训练物体识别模型的方法了,代码基本都是谷歌的。想要在深入的话就很复杂了,以后有机会再写吧。
-
卖家说以后长大会变成灰色,到时候会不会又来重新训练一个模型呢? ↩
-
This command needs to run from every new terminal you start. If you wish to avoid running this manually, you can add it as a new line to the end of your
~/.bashrcfile, replacingpwdwith the absolute path oftensorflow/models/researchon your system. ↩ -
如果在 PyCharm 里
import object_detection.*报错的话,不用管他。 ↩ -
这条命令主要适用于 jupyter, 我们在 pycharm 中运行的话这条语句没有任何作用。 ↩
-
目前有 imglabel 和 rectlabel 两款比较知名的打码软件,前者免费,后者付费。我使用的是后者。 ↩
-
大概是这样的就行,不一样的话也没有大的问题。文件名,长宽这些关键数据有就 ok,后期改一下转换代码就行了 ↩
-
在
data文件夹下新建一个*.pbtxt文件,参考同文件夹下的其他pbtxt文件做修改 ↩
本文作者 Auther:Soptq
本文链接 Link: https://soptq.me/2019/03/08/learn-to-use-object-detection-api/
版权声明 Copyright: 本博客所有文章除特别声明外,均采用 CC BY-NC-SA 4.0 许可协议。转载请注明出处。 Content on this site is licensed under the CC BY-NC-SA 4.0 license agreement unless otherwise noted. Attribution required.
发现存在错别字或者事实错误?请麻烦您点击 这里 汇报。谢谢您!